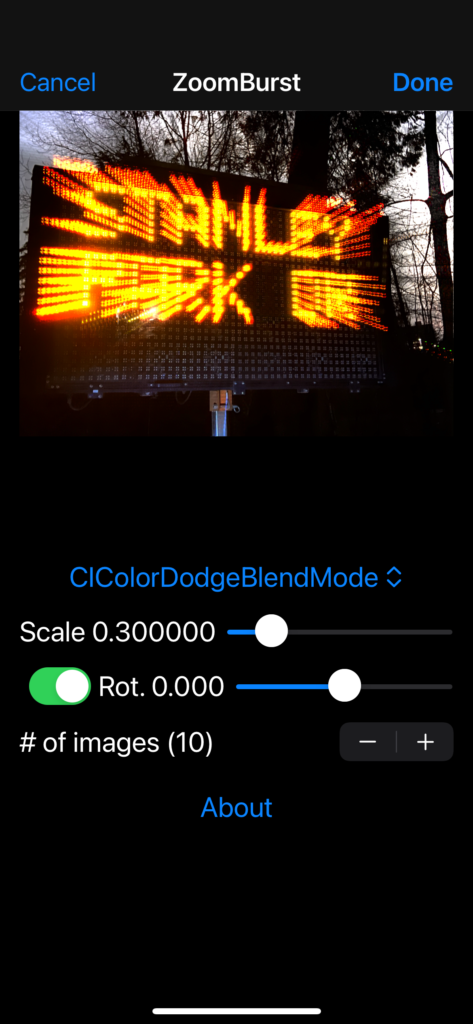
Categories
Software

How to Open a Photo Editing Extension

Until very recently I had never used a Photo Editing Extension. But now that I’ve built Zoom Burst, I wanted describe the steps involved in opening a photo editing extension.

Step 1. Open the photos app and select a photo

Step 2. Tap edit.

Step 3. Tap the circle with three dots. (in the top right corner of the screen)

Step 4. Select the editing extension of your choice. (eg ZoomBurst)

You can download Zoom Burst from the App Store.

Categories
Software

ZoomBurst is fun!

I’ve been enjoying playing with a Zoom Burst new photo editing extension that I’ve been building. It lets me add zoom burst effects to photos. If you don’t know what zoom burst is, I recommend you read this great article by Dahlia Ambrose. Or if you’d prefer, Wikipedia offers a great introduction. Before creating my Zoom Burst photo editing extension you needed an SLR (digital or otherwise) and a zoom lens to create zoom burst photos.

The procedure was:

  1. Set your shutter speed to 1/60th of a second or longer
  2. Press the shutter release in concert with changing the zoom focal length of the lens

In particular I really enjoyed creating zoom burst photos of lights at night. In early December, it felt like any time I saw Christmas lights, I wished I could create a zoom burst photo. Alas.

Now thanks to the miracle of Core Image, I’m able to convert this:

Into this:

I have been focussing my initial Zoom Burst efforts on getting it to work with photos of lights at night. I’m cautiously optimistic I’ll be able to extend it to also work with non-night photos. In the meantime, here are a few other photos before and after applying Zoom Burst.

Before

After

I think the controls in the Zoom Burst extension are fairly easy to figure out, but I’ve created a short tutorial, that is available here.

I had a bit of trouble organically discovering how to use a Photo Editing Extension. To prevent you from fumbling around like me, here is a list of instructions to open/use a Photo Editing Extension.

And here is a link to the app store:

Categories
Software

SwiftUI Being a bit Quirky

The Ecstasy and the Agony of Making Software

I recently wanted to create some content that would sometimes display in an HStack and sometimes in a VStack. The content was the same in both cases, so I wanted to avoid doing:

if goVertical {
    VStack {
        thing1
        thing2
    }
} else {
    HStack {
        thing1
        thing2
    }
}

Fortunately, I was able to use a ViewBuilder to contain the contents of the stacks.

@ViewBuilder var stackContents: some View {
    thing1
    thing2
}

...

if goVertical {
    VStack {
        contents
            .padding(.horizontal)
    }
} else {
    HStack {
        contents
    }
}

So far so good. (Aside: Am I the only one who didn’t know @ViewBuilder can be used to return a list of SwiftUI views?!) However I eventually got myself into a bit of trouble with my stack contents in an interesting way. Here are the details.

First you need to know that thing1 is an image and thing 2 is a VStack of sliders, steppers and such. Here’s how the view looks in portrait and landscape.

BUT… since I will be adding more sliders, steppers and such, I moved them into a ScrollView. But (as you can see on the right) when I did this, The ScrollView took more height than it needed and short changed the Image.

My first thought was in use a layoutPriority modifier on the image, but this had no effect, so I removed it. Next, I tried adding background modifiers to the VStack contents, and that proved to be very illuminating. (see below)

Here is the code with the background modifiers:

        VStack {
            contents
                .background(.red)
                .padding(.horizontal)
                .background(.blue)
        }
        .background(.yellow)

Applying horizontal padding to contents did not apply it once, it (presumably) iterated through all the items in contents and applied the padding to each item in contents.

I moved the padding (and background modifiers to apply to the VStack, instead of contents

        VStack {
            contents
        }
        .background(.red)
        .padding(.horizontal)
        .background(.blue)

Great, this looks more like what I was expecting with the padding. But the image is still narrower.

So I re-added the layoutPriority modifier to the image, and that did the trick. I still don’t understand why the ScrollView ‘steals’ vertical space from the Image. (And maybe one day I’ll better understand what causes me to anthropomorphize SW modules like layout engines.)

The interesting thing for me in this issue was how doing something incorrectly (ie applying the horizontal padding to the contents of the VStack, rather than to the VStack) worked correctly at first, but when the butterfly flapped its wings (ie one of the elements in contents was wrapped in a ScrollView) the wheels fell off.

Encountering and eventually overcoming this type of problem is a big part of the ecstasy and the agony of writing software.

Categories
Software

qualityOfService

While working on my zentangles app, I added a spinner that appears when the app is fetching or saving data to CloudKit. This appeared to be working wonderfully. But then I tried using the app when I didn’t have access to the network. The spinner appeared and never disappeared.

Not Good!

I immediately thought of a couple of things that might fix the problem. Things like setting the time out for the network operation, using the Reachability frame work to detect when there was no network. But when I attempted to set the CKOperation’s time out, Xcode told me I was using a deprecated function, and I should really be using CKOperationConfiguration. Groan! I thought. This new things is likely just helping some obscure use case that doesn’t apply to me.

Sure enough CKOperationConfiguration has a timeout interval property, to let me do what I thought I needed to do. But then I noticed another property called qualityOfService that can have one of the following values: background, utility, default, userInitiated, userInteractive. Hmm, the header describes the behaviour for these different values…

Description of the different values for CKOperationConfiguration’s qualityOfService property

As an aside, I find myself a bit confused on the subject of timeout intervals. It appears the operation’s configuration has a default timeout of 60 seconds. When I run in a simulator and disable networking on my computer, it appears to time out after 10 seconds When I run on an iPad, not on any networks, it appears to never time out. <Shrug Emoji>

Regardless of timeout confusion QualityOfService is a much smarter way to describe a network operation. When I set QualityOfService to UserInteractive and then attempted a fetch on a device with no network, the operation immediately failed. (likely thanks to internally using Reachability?) Awesome!

I do still have a couple of questions about Quality of Service.

  1. Are there any behaviour differences between UserInteractive and UserInitiated? From the table above, they appear to be identical, but the devil may be in the details.
  2. Is there a way to create a hybrid approach? ie can I get a result right away that will make my spinner go away, but still do retries?
    Perhaps I don’t really need a spinner on a network operation that is just sending updates to the server….
Categories
Software

WWDC 2021

No this does not refer to the Western Washington Debutantes Convention. Today is the first day of Apple’s World Wide Developers Conference. For anyone who writes software for iPhones, iPads, Watches, and Apple computers, it tends to be a very exciting week.

Sometimes there are new hardware announcements and releases. Other times there are big technology changes, such as a new development language (eg Swift!). Every time there are a lot of new technology announcements, that are usually obscure as heck. (eg. a new interface for coding In App Purchases)

Buried among the intimidating amount and complexity of detailed information, there are usually a few fun nuggets of new things I find very cool. So far this year, the best example of this is a new feature in the photos app that detects text in photos. Users will be able to copy text in photos and paste it into any other apps. They will also be able to detect and call phone numbers when they show up in photos. Crazy!

Before Covid, the conference was in San Francisco and the information was really only available to people who attended in person. Some time in the past 10 years the conference became ridiculously over subscribed and it became a lottery to be able to attend. At about the same time the information from all the presentations was made available on line.

The last two years, due to Covid, the conference was entirely online and free for everyone. (Attending in person in previous years typically cost ~$1500 USD.)

I have been to WWDC twice, once in 2004 and once in 2010. In 2004, I was attending with a co-worker who was very much a night owl. He would typically arrive at work around 11am. At WWDC I was very perplexed when he insisted we arrive at 6am for the Keynote Address on the first day that didn’t start until 10am.

When we arrived at 6am, there were already hundreds of people in line. I later realized this was most likely due to the personality cult around Steve Jobs. While I’d like to think I wasn’t susceptible to his reality distortion field, it was still pretty exciting to be in the room for his presentations.

Categories
Software

A SwiftUI Picker Using an Swift Enum Part 2

In Part 1, we created a basic SwiftUI Picker that was bound to an enum variable that included n possible values. When users pick a value from the picker, the app’s data model is aware of this change and the UI updates to reflect the user’s selection.

In this post we are going to extend this basic functionality.

Display Text for Sort Types

Life would be better if we could customize the display text for each of the different sort types. To do this we will add a function to our enum.

    func displayText() -> String {
        switch self {
        case .name:
            return NSLocalizedString("Name", comment: "display text for sort type: name")
        case .height:
            return NSLocalizedString("Height", comment: "display text for sort type: height")
        case .averageScore:
            return NSLocalizedString("Average Score", comment: "display text for sort type: averageScore")
        }
    }

In order to use this new function, replace rawValue calls with displayText() calls.

struct ContentView: View {
    @ObservedObject var settings = Settings.shared
    var body: some View {
        VStack {
            Picker(selection: $settings.sortType, label: Text("Sort Type")) {
                ForEach(SortType.allCases, id: \.self) { sortType in
                    Text("\(sortType.displayText())")
                }
            }
            Text("sort type is: \(settings.sortType.displayText())")
        }
    }
}

Persist Preferred Sort Type

In this section we will add code to remember a user’s previously selected sort type. So if the user closes the app and relaunches it, their preferred sort type will still be selected. To do this, we will write the sortType to UserDefaults, and then read this value when the app launches. These changes will be made in the Settings class.

class Settings: ObservableObject {
    static let shared = Settings()
    @Published var sortType: SortType {
        didSet {
            UserDefaults.standard.setValue(sortType.rawValue, forKey: "sortType")
        }
    }
    init() {
        sortType = SortType(rawValue: UserDefaults.standard.string(forKey: "sortType") ?? "name") ?? .name
    }
}

I’m mildly pained by the need to include both a fallback value for the string read from UserDefaults and also a fallback value SortType(rawValue: ) return value. I guess this is just my way to demonstrate that I don’t like forced unwraps !

Add a New Sort Type

So what happens when end requirements change and now our data can also be sorted by…. let’s say Shoe Size? What needs to change in our example? In fact, very little needs to change. Basically just add the new enum case, and add a corresponding case to the displayText function

enum SortType: String, CaseIterable {
    case name
    case height
    case averageScore
    case shoeSize
    
    func displayText() -> String {
        switch self {
        case .name:
            return NSLocalizedString("Name", comment: "display text for sort type: name")
        case .height:
            return NSLocalizedString("Height", comment: "display text for sort type: height")
        case .averageScore:
            return NSLocalizedString("Average Score", comment: "display text for sort type: averageScore")
        case .shoeSize:
            return NSLocalizedString("Shoe Size", comment: "display text for sort type: shoeSize")
        }
    }
}
Categories
Software Uncategorized

A SwiftUI Picker Using an Swift Enum

These two items (the SwiftUI Picker and a Swift enum) work really well together. Some might say they go together as well as Peanut Butter and Banana.

Requirement: Your app needs a way for a user to choose how to sort their list items. Today list items can be sorted by Name, Height and Average Score. Some time in the future, the list of sort types is expected to grow.

Eventually we are going to need some UI for this, but let’s start be defining an enum to define the sort types. Our enum needs to conform to CaseIterable because we will need to call the allCases class method. I don’t think String is required, but is helpful in the initial stage before we polish the UI.

enum SortType: String, CaseIterable {
    case name
    case height
    case averageScore
}

And also a Settings model object to store our source of truth (ie sort type) We will access the Settings singleton via the shared static variable. Settings needs to conform to ObservableObject because the Picker will bind to the sortType property.

class Settings: ObservableObject {
    static let shared = Settings()
    @Published var sortType: SortType
    init() {
        sortType = .name
    }
}

For the UI, we will use the following Picker init

    public init(selection: Binding<SelectionValue>, label: Label, @ViewBuilder content: () -> Content)

The UI content view will start with something like this:

struct ContentView: View {
    @ObservedObject var settings = Settings.shared
    var body: some View {
        VStack {
            Picker(selection: $settings.sortType, label: Text("Sort Type")) {
                ForEach(SortType.allCases, id: \.self) { sortType in
                    Text("\(sortType.rawValue)")
                }
            }
            Text("sort type is: \(settings.sortType.rawValue)")
        }
    }
}

If we run this code, we’ll see a picker above a text label. When we pick a different value in the picker, the text label updates accordingly. Woot!

In Part 2, we will:

  1. Improve the UI by adding display names for the sort types
  2. Use UserDefaults to persist and recall the selected sort type
  3. Add another sort type
Categories
Software

Zentangle App

I’ve already mentioned my affinity for making zentangles however I often struggle with choosing which tangles to include. I always fear I’ll get in a rut and repeatedly pick the same tangles, and miss out on others that would feel good to draw. However the only thing worse than inadvertently ignoring an old favourite would be spending a lot of time and energy diligently making sure my picking was fair.

To this end, I want to build an app that will keep track of all the tangles, and which ones I’ve used most, and also allow me to pick some of my favourites. Also (not sure how useful this will be) it’d be nice to present a set of suggestions that include different types of patterns.

All this to say, I’ve been working on an app that uses the CloudKit framework to store both the immutable and the mutable tangle details. I’ve come across a few interesting technical challenges along the way. My plan is to create some posts to describe some of these challenges and things I’ve learned about CloudKit.

possible topics:

  • turning a swiftUI Image into a Navigation Link and it turns blue
  • connecting an enum to a swiftUI Picker
  • the value of being able to set recordId’s (and don’t forget to include the prefix)
  • challenges I’ve found when using iCloud dashboard (save needs to be clicked twice, adding index loses recent edits)
  • SettingsView, userDefaults
  • tabBar via model
  • navViews in a tabBar seem to reset (or get confused if you switch tabs and come back